Overview
This document will explain how to create a new supplier or update an existing one with the data needed to process purchase orders. Users will learn how to effectively manage supplier data and maintain a strong and reliable supplier database for better data accuracy, operational efficiency, reporting and analysis, and integration.
Process
Primary features of Supplier Maintenance include the following:
- Creating a new supplier and new supplier codes.
- Enter supplier’s information, including name, address, phone number, and payment method. Users can also serve as suppliers for a variety of payment and reimbursement methods.
- Configure additional details, such as tax rates, currency, and delivery options.
- Modify and update supplier account information.
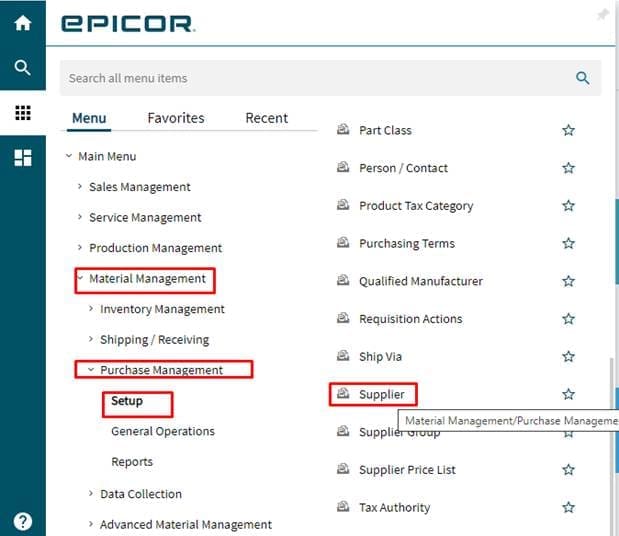
Menu Path
Material Management > Purchase Management > Setup > Supplier
Supplier Maintenance
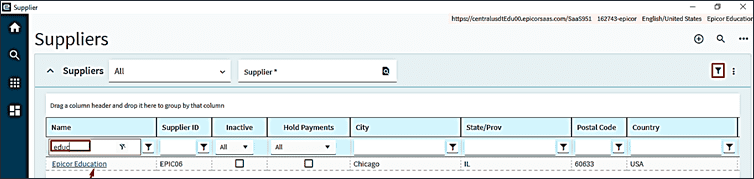
Enter the supplier ID in the Suppliers field or use the search/magnifier.
A search screen will appear, with the option to sort by supplier ID and name.
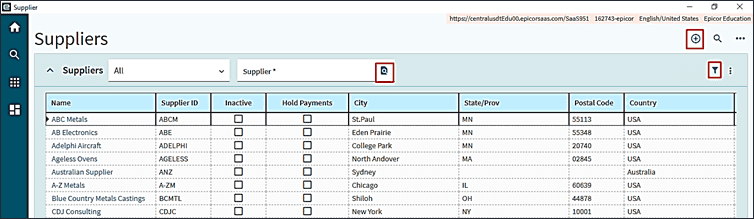
Existing suppliers can also be selected from the list using filters.
Supplier Detail
In Supplier Maintenance, select “Create New Supplier / Vendor”. The supplier details screen will appear. Enter the Supplier ID, Name, Terms, and other required fields, then click Save.
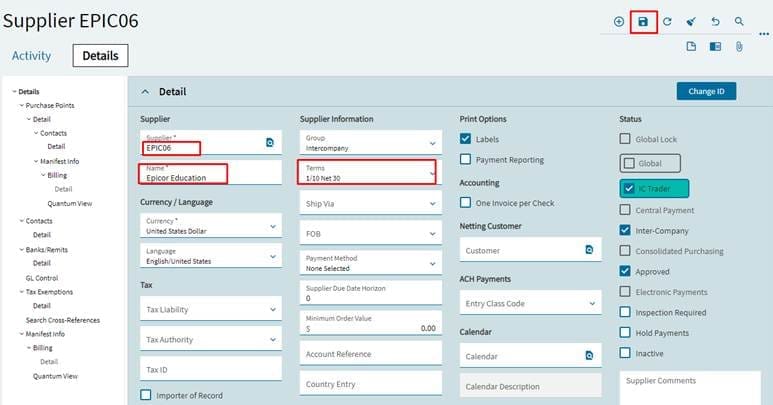
Field Name | R/O/D* | Description |
| Supplier | R | The Supplier code is an alpha-numeric unique value used to locate and identify the supplier; it can include both numbers and characters. Select the first eight characters of the supplier’s name. searches can be conducted using the ID and other information, such as the name. |
| Name | R | Enter the supplier registered name, this field is limited to 50 characters. |
| Tax Liability | O | Select the supplier’s Tax Liability, such as state, local, or other taxes, from the drop-down list. |
| Tax ID | R | Enter the supplier’s federal Tax ID number. |
| Tax Authority | D | *NOT APPLICABLE* Used only if there is a link to an external finance system. |
| Account Reference | O | This is the reference number for your supplier account and the customer ID in the supplier’s ERP/accounting system. |
| Approved | R | Check box if the supplier has been approved. Uncheck box if the supplier should no longer be used. If unchecked, no purchase order can be made for supplier. |
| Inspection Required | O | Set this indicator to ensure that all payments are held for this supplier and excluded from check processing. |
| Hold Payment | O | Set this indicator to hold all payments to this supplier. The supplier will not be included in the check processing. |
| Inactive | O | Set this to indicate the supplier is Inactive, and can no longer be used to make purchases. |
| Country Entry | D | *NOT APPLICABLE* Used for intrastate reporting to identify the entry point for goods shipped by this supplier. |
| Calendar | O | Enter a Calendar showing the supplier’s production schedule, and defined in “Manufacturing Setup”. This is useful when the supplier is closed, or the products are only available at certain times of the year. |
| Group | O | Separate or Group suppliers based on the products they sell; for example, plastics, bearings, and glass are common categories; These must be defined in the “Supplier Group Maintenance”. |
| Terms | R | Select payment Terms for the supplier. Prior to assigning, the terms must be defined in the “Purchase Terms Maintenance”. |
| FOB | R | This refers to the moment when the supplier transfers ownership and title of the product to our company. (“Ex Works” – when the part(s) leave the supplier’s facility). |
| Minimum Order Value | O | Set this amount when placing a purchase order if the supplier has a Minimum Order Value. |
| Payment Method | R | Select Payment Method for the supplier. Most all our suppliers will use AP Check. Prior to being assigned, the payment method must be kept current in “Setup Payment Methods” |
| Labels | D | *NOT APPLICABLE* Select option if labels are to be printed on documents. |
| 1099 | O | Specify if supplier should receive a 1099 at the end of the year. Supplier is not a corporation and does not use federal tax ID. |
| One Invoice Per Check | O | Set the indicator if this supplier’s invoices will be paid by check, such as one check for one invoice. |
| Netting Customer | O | Refers to a supplier who also serves as a customer. If a customer ID is entered, “Open AR Invoices” are automatically compared to “Open AP Invoices” to determine the net due. the customer ID used was created during customer maintenance. |
| *R/O/D (Required / Optional / Display) | ||
Supplier Address
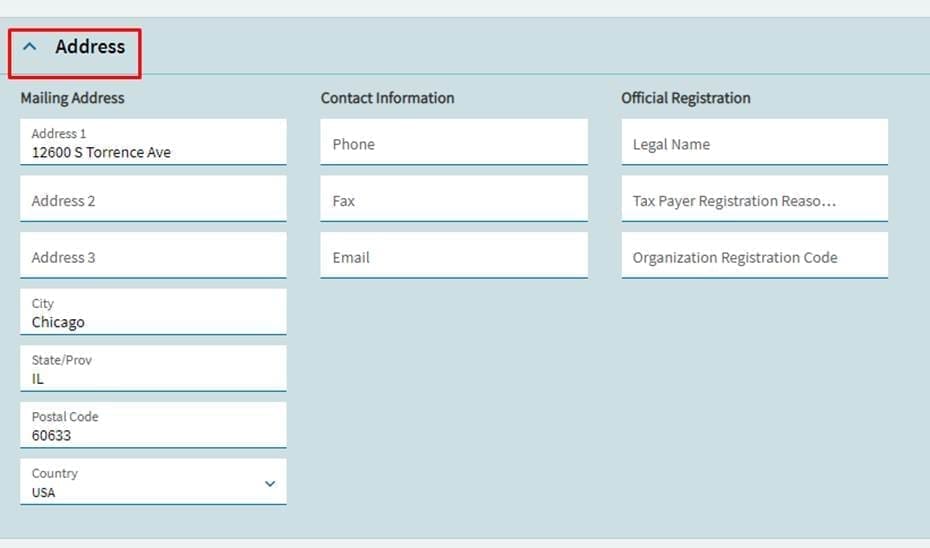
Navigate to the address tab.
Field Name | R/O/D | Description |
| Address | R | This is the supplier’s payment address. Enter the supplier address in the three available lines which will be printed on purchase orders and other documents. |
| City | R | Enter the city of the supplier’s payment address. |
| State | R | Enter the US state abbreviation. If address is international, you can disable printing of this field on the “Address Format” tab. |
| Postal Code | R | Enter the postcode for the supplier’s payment address. |
| Country | R | Enter the country code for the supplier’s payment address. |
| Phone | R | Enter the supplier’s phone number for following up on invoices, or other documents. |
| Fax | O | Enter supplier’s fax number for sending purchase orders. |
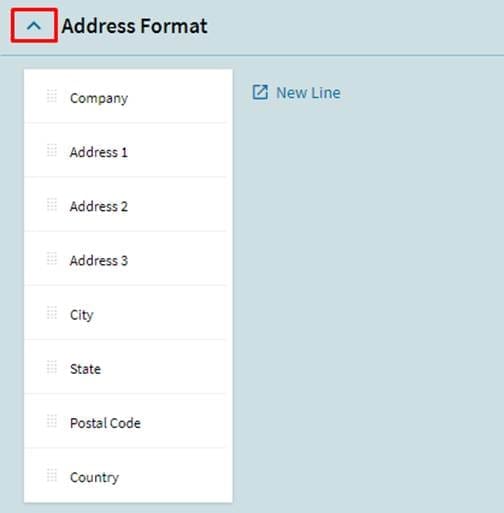
| O | This screen allows you to rearrange and remove fields from forms, such as purchase orders for specific suppliers. This feature can be used to enable foreign suppliers by printing addresses on forms. |
Navigate to the “Address Format” tab.
Supplier Contacts
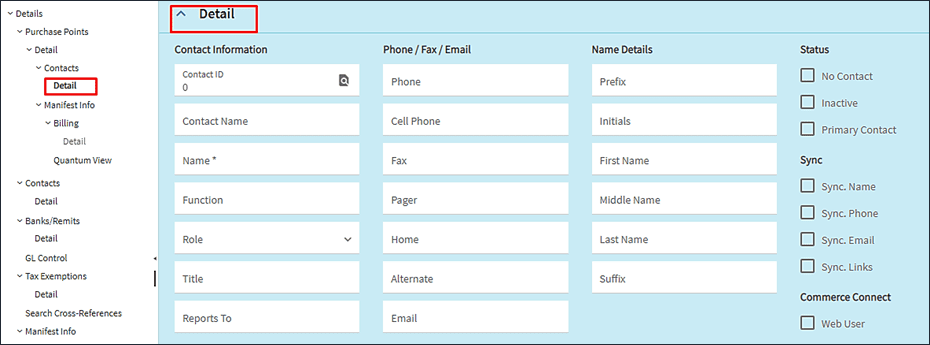
Navigate to the “Contacts” tab.

Field Name | R/O/D | Description |
| Name | R | Enter the first and last name of the supplier’s contact. |
| Function | O | Enter the role of the supplier’s contact. This is a free-form text field that must be filled out on a regular basis. |
| Role | R | Enter the relevant role for this contact by selecting from the dropdown menu. |
| Title | O | Enter the contact’s title, if it is known. |
| Reports-to | O | Enter the name of who this contact report to, if it is known. |
| R | Enter the contact’s email address. | |
| Phone | R | Enter the contact’s home or landline number. |
| Cell Phone | O | Enter the contact’s mobile number. |
| Fax | O | Enter supplier’s Fax number for sending purchase orders. |
| Pager | O | Enter the contact’s Pager number. |
| Home | O | Enter the contact’s Home number or landline. |
| Alternate | O | Enter an Alternate phone number for this contact. |
| No Contact | O | Check box if there will be no further contact with this person. |
| Inactive | O | Check box if the contact is no longer with the client or in this role. |
| Primary Contact | O | Check box if this is the Primary Contact at this supplier. |
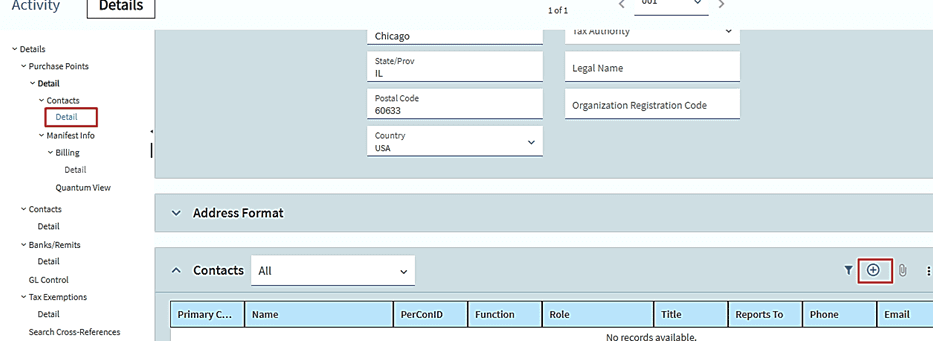
Purchase Points are the locations where supplier will deliver goods or provide services.
Purchase Point / Detail
Click on “Purchase Points” to add new location.
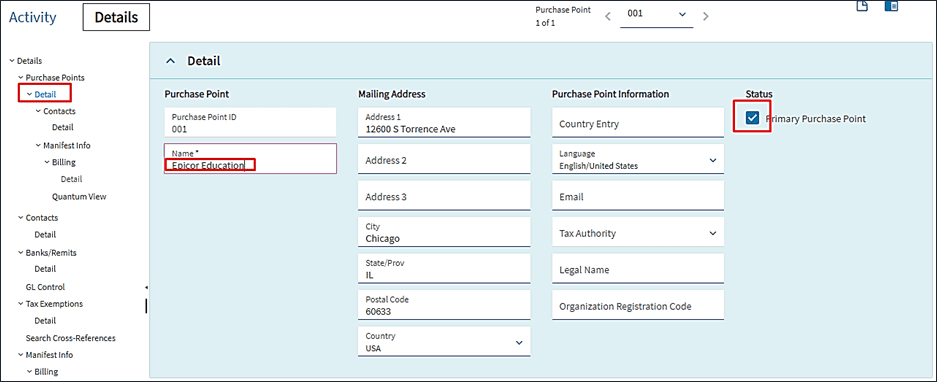
Field Name | R/O/D | Description |
| Purchase Point | R | Select four-character code to identify the Purchase Point. If the supplier has multiple locations throughout the country, use a region-specific code, e.g., NE for Northeast, MW for Midwest, etc. |
| Primary Purchase Point | R | Check box If this is where we make the majority of our purchases from the supplier |
| Address | R | This is the supplier’s payment Address. The supplier’s Address can be entered using the three lines, and will appear on purchase orders and documents. |
| City | R | Enter the City of the supplier’s payment address. |
| State / Province | R | Enter the US State abbreviation. For international addresses, you can remove this field from the “Print Address Format” tab. |
| Postal Code | R | Enter the Postal Code for the supplier’s billing address. |
| Country | R | Select the Country code for this purchase point. |
| O | Enter the supplier’s email address to send electronic purchase order copies to this purchase point. |
Purchase Point / Address Format
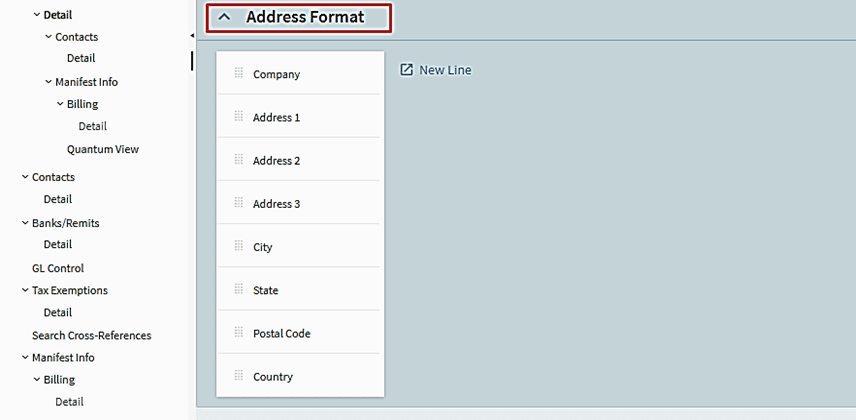
Both purchase point(s) and primary purchasing addresses can appear on documents in the same format. If the supplier has multiple purchase points, users can select / switch between them.
Purchase Point / Contacts
The same contacts you have with the supplier can be used for the supplier’s purchase point(s).