Purpose
Use this procedure to create, print and post invoice payments, manual payments, and miscellaneous payments.
Process Summarized
- Create Group
- Select ‘New Group’
- Enter group ID,
- Select Bank.
- Select Payment date.
- Create Invoice payment,
- From the new menu select ‘New Invoice Payment’ or from overflow menu, click “select Invoices”,
- Print edit list
- Select ‘print edit list’,
- Post group
- Select ‘Post’
Payment Entry
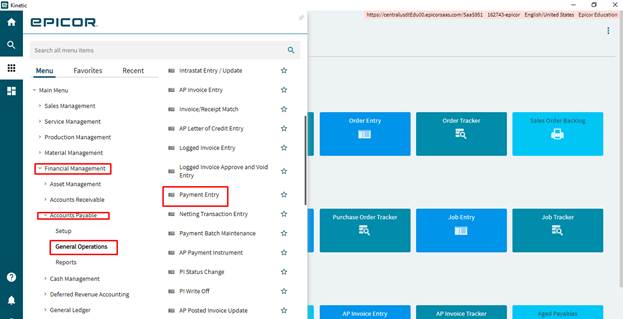
Menu Path
- Financial Management/Accounts Payable/General Operations/Payment Entry
Creating New Group
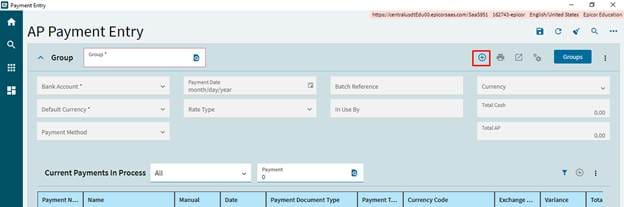
Steps
- Click on the New Icon
.
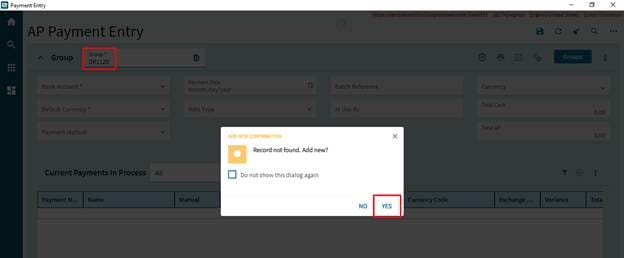
- Enter the group id or search for an existing group, and then press the TAB key.
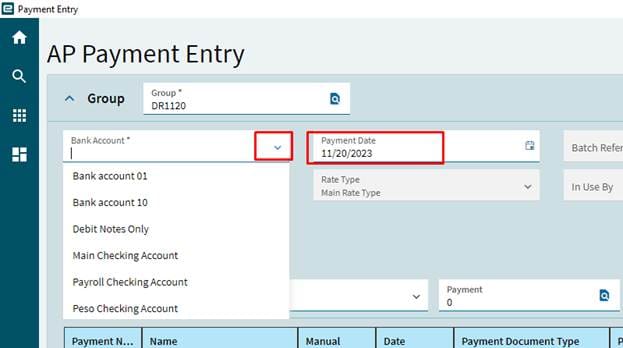
- Select Bank Account:
- Use the drop down and select the bank account that this payment group will be drawn from.
- Enter a Payment Method.
- This will be how you are going to be paying the invoices that will be selected for this group. If paying by check select your AP Check Payment.
- Enter the Payment Date:
- Enter the date that you would like to make these payments on.
- Click Save.
System Picks Invoices need Payment
Steps
- From the overflow menu
, click on Select Invoices.
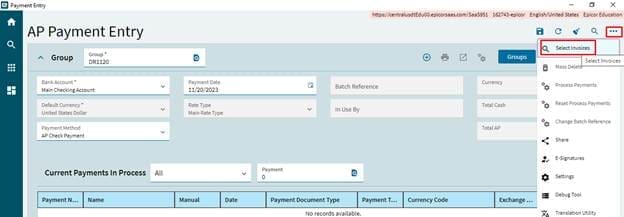
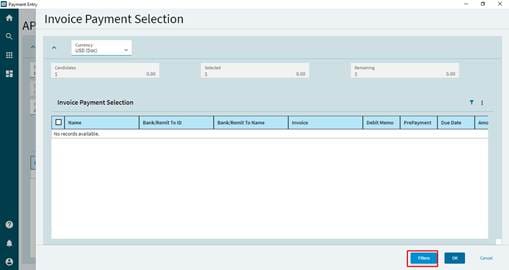
- The Select Invoices window displays
- Click on Filter if thee is no record in the list.
- Select “Include Invoices without payment method” check box and click ok.
- This will result with all the open invoices.
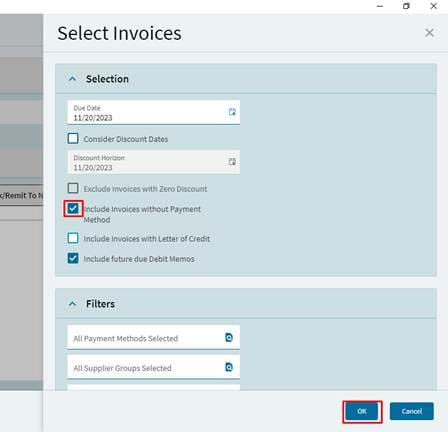
- Due Date: Enter the latest due date for invoices that you want the selection routine to consider. Using the above screen print, all invoices due on or before 6/9/2014 will be considered by the selection routine. The system date defaults into this field but can be overridden if necessary.
- Consider Discount Dates: If you have terms with any vendors that allow for a prompt payment discount and you want to take those discounts, check the Consider Discount Dates check box. Checking this box will cause the selection program to look at invoices that are within the prompt payment window but whose due date falls beyond the Due Date field value.
- Include Invoice without Payment Method: Selecting this checkbox will allow the selection process to pick up invoices that have suppliers that do not have a payment method setup on them. The payment method is not a required field when setting up suppliers, so it is recommended that you check this check box unless you have intentionally not set suppliers payment method so that you have to manually select those suppliers invoices.
- Click the OK button
and the Invoice Payment Selection window displays. This display is a listing of all the invoices that meet the selection criteria. In the Selection Totals section of the screen, you will see displayed the total amount of invoices selected by the system in the Candidates field, the amount of invoices you have chosen to pay from this selection list in the Selected field and the amount of the remaining invoices in the selection list that you have not selected to pay in the Remaining field.
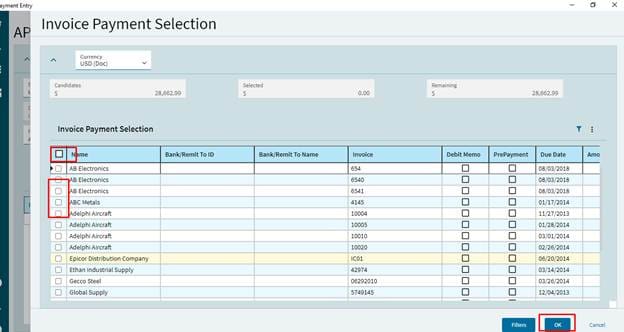
- To pay an invoice from the selection you can:
- Click on the Select All
to select all the invoice candidates.
- Hold down the CTRL key and left mouse click on the invoice(s) you want to pay in this payment group.
- Click on the Select All
- Click OK after you have selected all the invoices that you are going to process. Invoices that have been selected will now display in the AP Payment Entry Current Payments In Processsection.
- Click Save
- If you have no other invoices that you want to pay go to the section ‘Pay the Selected Invoices’.

User Picks Invoices for Payment
Steps
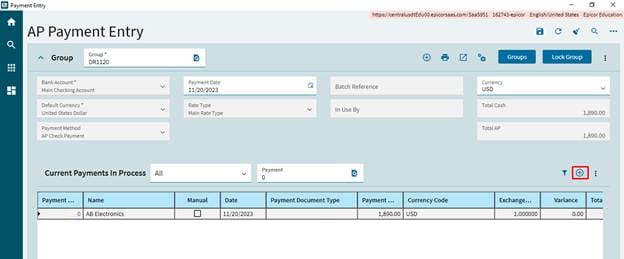
- Navigate to the Group in AP Payment Entry Screen.
- Click on New
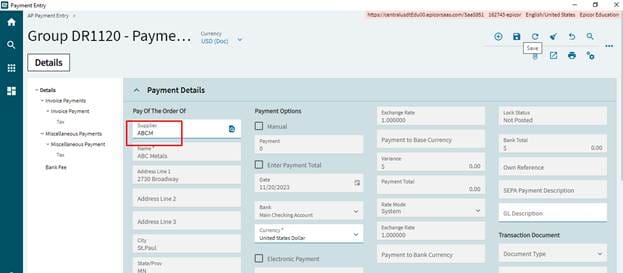
- Select the supplier which you would like to pay by entering the Supplier’s ID in the Supplier field or select it using the Supplier search button.
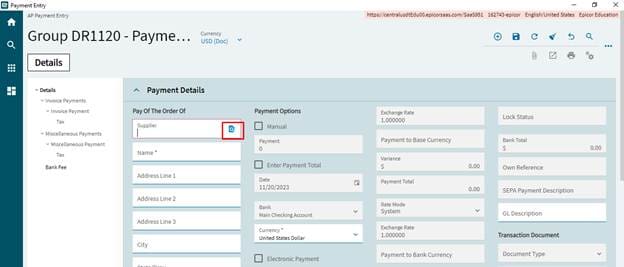
- Navigate to Invoice payment and select New Invoice Payment.
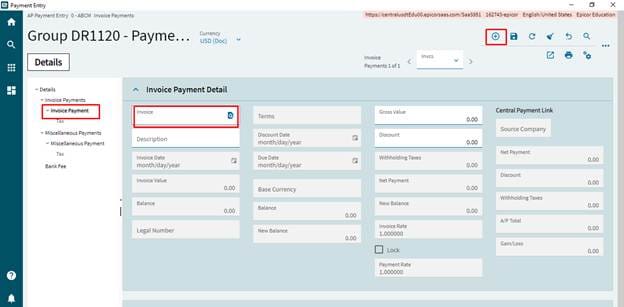
- Select the invoice to pay by entering the invoice number in the Invoice field or use the invoice lookup button to select one.
- Click Save.
- Repeat this process for each invoice that you would like to manually select.
Process Miscellaneous Payments Unrelated to A/P Invoices
Steps
In certain scenarios, you may wish to process a payment that is unrelated to an A/P invoice. As an example you write a physical check for $100.00 to pay for office supplies to a supplier who does not exist in the Supplier Master file.
- Navigate to the Detail Screen on the AP Payment Entry Screen.

- From the New menu, select New Payment.
- In the Name field, enter the company name that you wrote the check to.
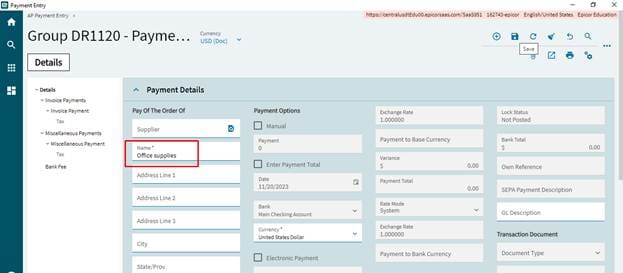
- Click Save
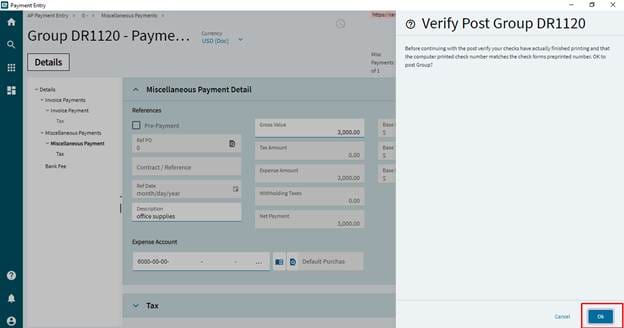
- Navigate to the Miscellaneous Payment Detail sheet.
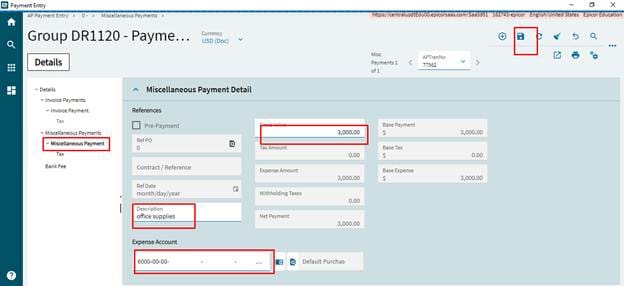
- Select New Misc. Payment
- In the Payment Amount field, enter the amount of the payment. Example: 100.00
- In the Description field, enter the description of this payment. Example: Office Supplies.
- Click on Save. GL account will be populated by default.
- In the Account field, enter the GL account that you want this payment charged to or right click and select Open with – General Ledger Search.
- Click Save.
Pay the Selected Invoices
- From the overflow menu
select Process Payments. The Process Payment window displays.
- The Payment Date, Fiscal Year, Fiscal Period and Bank Account fields default in from the payment group header that you created. You may change the Payment Date and Bank Account if it is needed. This is not recommended as your group should be set to the correct date and Bank Account to use.

- The Payment number currently loaded field contains the check number that is the sum of the last check number processed against this bank account plus one. This can be overridden by selecting the Override Payment check box. If the check number is incorrect and you check the Override Payment check box, the Payment number currently loaded opens up and you may put in the actual check number that you want to start with.
- Be careful as you may not have a check number in your run that is already used. The system will take and skip those check numbers and assign the next number that is available.
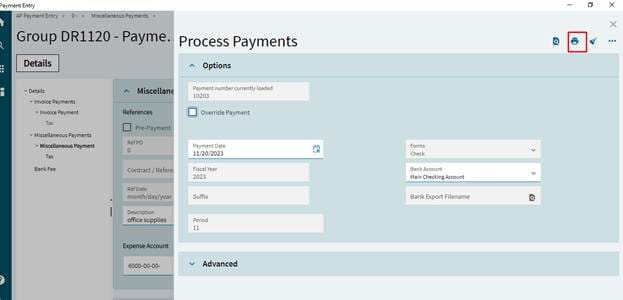
Click Print.
- You MUST select a printer in order to print. If a printer is not available, consider print ot Adobe.
- Close the Process Payments window.
- The first payment listed in the Current Payments in Process grid now displays the first payment number.
Print Edit List and Post
- From the Actions menu, select Print Group Edit List

- Click Print Preview to view the report or Print to print it without previewing it on your screen.
- Review the edit listing. If you did the Print Preview and want to print it click Print.
- From the Actions menu, select Post.

- There will be a message: Before continuing with the post verify your checks have actually finished printing and that the computer printed check number matches the check forms pre printed number. OK to Post Group?, Click on Ok.
- If the checks have printed successfully and the numbers are correct click Yes.
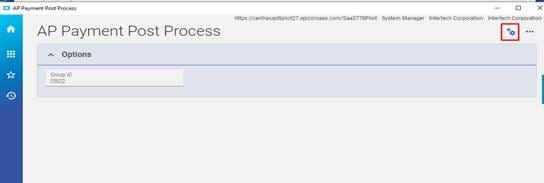
- The AP Payment Post Process window displays.
- Click Submit
and close
the AP Payment Post Process Window.