Overview
This document will detail how to create a new customer or change an existing customer with the required information for sales order processing.
Adding Customer
Menu Path
Accounts Receivable > Setup > Customers
Customer Details
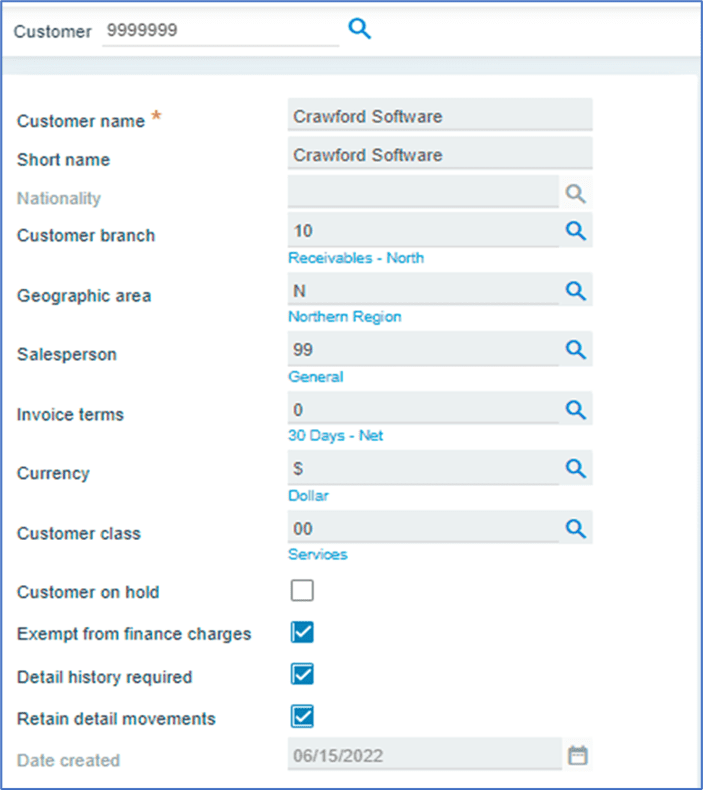
Customer Information
Field Name | R/O/D* | Description |
| Customer | R | Customer number will auto-generate if the numbering method is set to Automatic in the setup option, if it is set to Manual, it must be entered manually. |
| Customer Name | R | Enter Customer Name. |
| Short Name | R | Enter the Short Name of the customer. |
| Customer Branch | R | Using the magnifier, select the branch that will be used to create the customer. |
| Geographic Area | O | If the Geographic Areas has been configured, choose from the list of options. |
| Salesperson | O | Select the Salesperson assigned to the account from the list. |
| Invoice Terms | R | Select one of the Invoice Terms from the list. |
| Currency | R | Choose a Currency from the list of predefined currencies. |
| Customer Class | O | If a Customer Class has been configured to categorize the customer, select one from the list of options. |
| Nationality | O | Select the customer /contact’s country of origin from the list of options. |
| Customer On-Hold | O | Check this box to indicate that the customer should be placed On Hold. (When a customer is on hold, the transaction cannot be processed). |
| Exempt from Finance Charges | O | Check the box if the customer should be placed On Hold. (A transaction cannot be completed while the customer is on hold). |
| Detail History Required | O | To save history of all updates and changes made on the customer’s account, checkbox must be selected. By default, this field is checked. |
| Retain Detail Movements | O | To save a history of all updates and changes made to the customer account, leave this box checked. (By default, this field is enabled). |
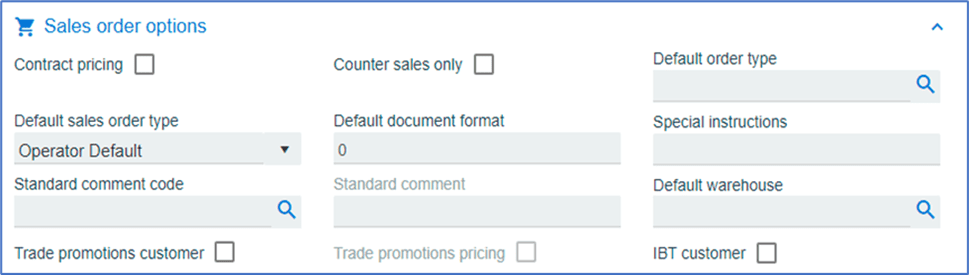
| Contract Pricing | O | If contract is maintained for the customer, the check box must be selected. |
| Counter Sales Only | O | Check this box If the customer is used for Counter Sales Only. |
| Default Order Type | O | Select the required Default Order Type for the customer from the list of transactions. |
| Default Sales Order Type | O | Select the required Default Sales Order Type for the customer from the list of transactions. |
| Default Document Format | O | Select the Default Document Format type required for document printing and transmission. |
| Standard Comment Code | O | Select a Standard Comment Code from the list. |
| Standard Comment | D | The code selected above will be used as the Standard Comment by default. |
| Language | D | Default is blank for English. |
| Special Instructions | O | Enter any default Special Instructions for the customer. |
| Default Warehouse | O | Choose the Default Shipping Warehouse for customer orders. |
| Trade Promotions Customer | O | Check this box If customer is eligible for Trade Promotions. |
| Trade Promotions Pricing | O | Check this box if customer is eligible for Trade Promotion Pricing. |
| IBT Customer | O | Check the box if customer is an IBT Customer. |
| Date Created | D | The date the customer was created in the system is used by default. |
| *R/O/D (Required / Optional / Display) | ||
Split Commission

Field Name | R/O/D | Description |
| Salesperson 2 | O | If the sales commission is to be split with another salesperson, the other sales person’s name needs to be captured. |
| Salesperson 3 | O | If the sales commission is to be split with another salesperson, the other salesperson’s name needs to be captured. |
| Salesperson 4 | O | If the sales commission is to be split with another salesperson, the other sales person’s name needs to be captured. |
Buying Groups

Field Name | R/O/D | Description |
| Buying Group 1 | O | If a customer is assigned by Buy Group, the group name needs to be captured. |
| Buying Group 2 | O | If a customer is assigned to multiple Buy Groups, the group name needs to be captured. |
| Buying Group 3 | O | If a customer is assigned to multiple Buy Groups, the group name needs to be captured. |
| Buying Group 4 | O | If a customer is assigned to multiple Buy Groups, the group name needs to be captured. |
| Buying Group 5 | O | If a customer is assigned to multiple Buy Groups, the group name needs to be captured. |
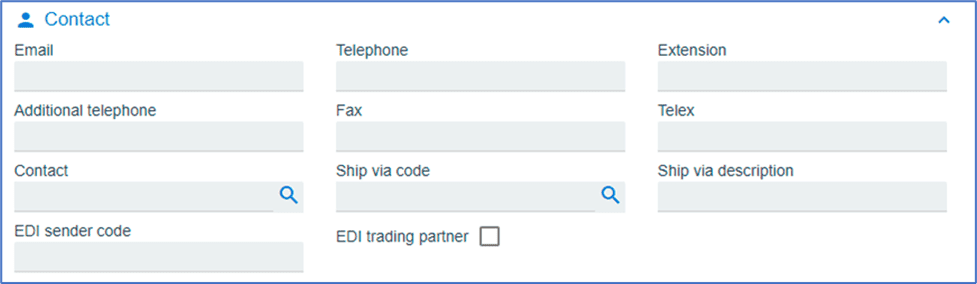
Contact Details
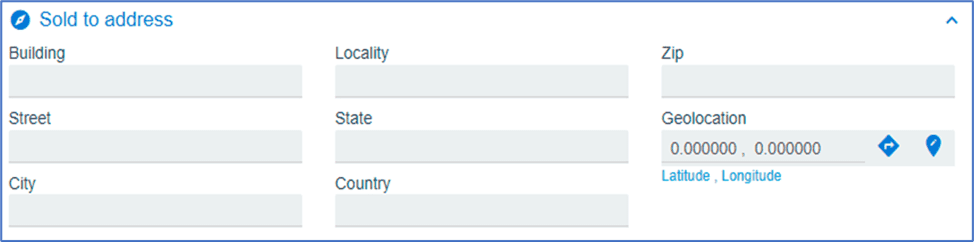
Sold-to Address
Ship-to Address
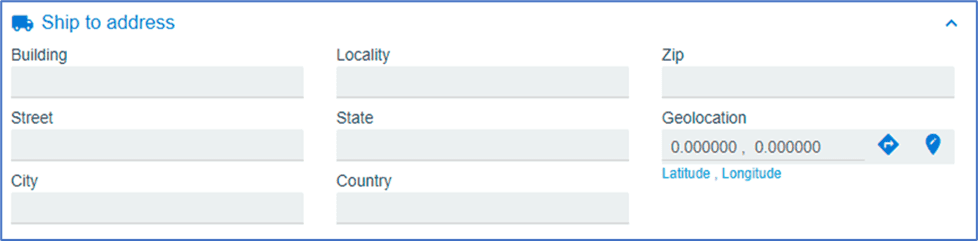
Field Name | R/O/D | Description |
| Building | O | Enter Building number and building name. |
| Street | R | Enter Street name. |
| City | R | Enter City of the supplier. |
| State | R | Enter State. |
| Country | R | Enter Country. |
| Zip | R | Enter Zip code. |
| Locality | O | Enter Locality. |
| Geolocation | O | Enter the coordinates. |
Multiple Ship-to Address

Document Transmission
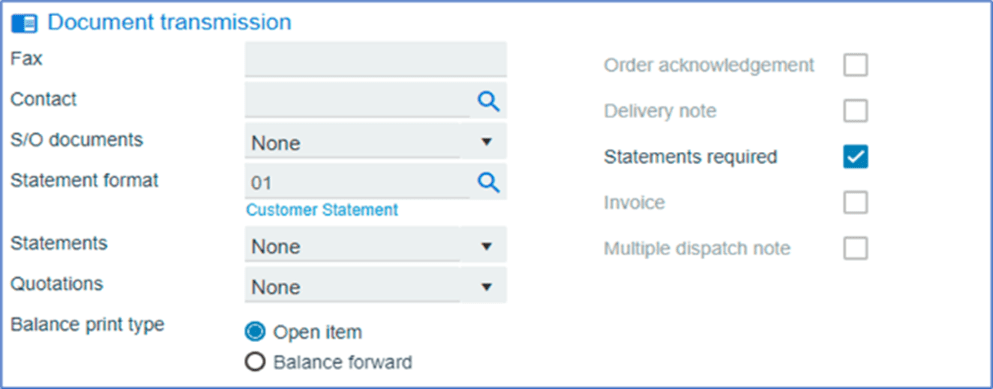
| Field Name | R/O/D | Description |
| Fax | O | Enter Fax number needed for sending documents. |
| Contact | O | Enter the Contact name. |
| S/O Documents | O | Select if any specific documents are set to default transmission. |
| Order Acknowledgement | O | Select if an Order Acknowledgement is required from the customer. |
| Delivery Note | O | Select if a Delivery Note is required for the customer. |
| Invoice | O | Select if Invoice is required to be sent to the customer. |
| Multiple Dispatch Note | O | Select if customer requires Multiple Dispatch Notes. |
| Statements | O | Select if Statements need to be sent. |
| Quotations | O | Select if Quotations need to be transmitted to customer as default. |
| Statements Required | O | Select if customer requires Statements. |
| Statement Format | O | Save If the customer requires a custom statement format. |
| Balance Print Type | O | Select from two options: Open Item or Balance Forward. |
General Details
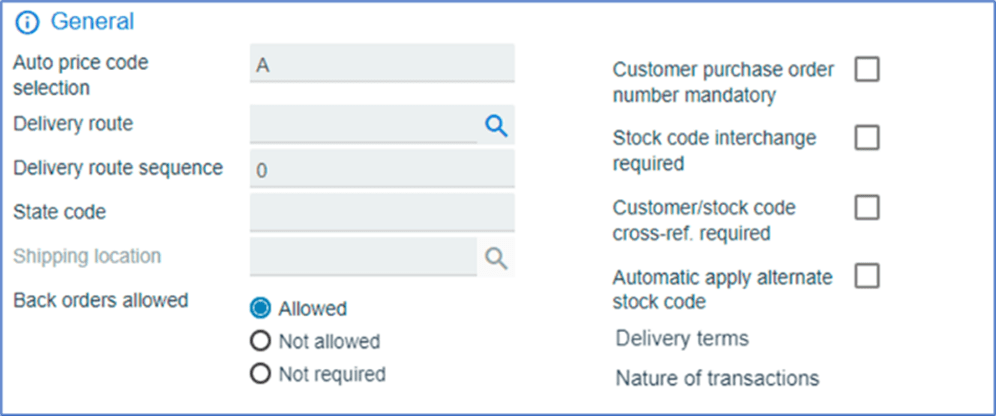
| Field Name | R/O/D | Description |
| Back Order Allowed | O | Select based on customer requirements: Allowed, Not Allowed, or Not Required. |
| Stock Code Interchange | O | Select If the Stock Code needs to be interchanged for the customer |
| Customer/Stock Cross-Reference Required | O | Select if customer has Stock Code Cross Reference that needs be assigned to them. |
| Customer Purchase Order Number Mandatory | O | Select If Customer PO Number should be made mandatory. |
| Auto Price Code Selection | O | Set up the flag for Auto Price Code Selection (default is blank – generally not required). |
| State Code | O | If the customer is specific to State for deliveries, keep the default state (default is blank). |
| Delivery Route | O | Enter the Delivery Route code for deliveries if the client uses a conventional route for load planning. |
| Delivery Route Sequence | O | If there is a default Delivery Route Sequence for the customer, the code must be saved and used for load planning. |
Tax
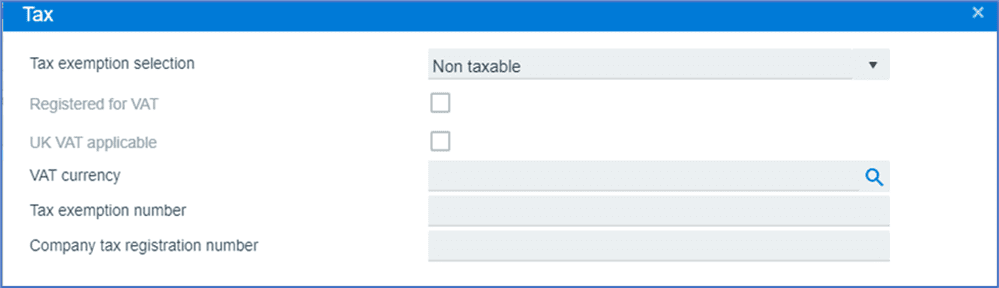
Field Name | R/O/D | Description |
| Tax Exemption Selection | O | Select from the drop-down menu: Non-Taxable, Taxable, or Other Tax Code. |
| Registered for VAT | O | Save if the customer is subject to VAT. |
| VAT Currency | O | Save if the customer is subject to VAT. |
| Tax Exemption Number | O | If the country provides a Tax Exemption Number, enter it here. |
| Company Tax Registration Number | O | If the customer provides their Company Tax Registration Number, enter it here. |
| User Defined 1 | O | Customize the field to store any additional values for the customer. |
| User Defined 2 | O | This field can be customized to hold any additional information for the customer and is designated as a numeric value. |
| Automatic Apply Alternate Stock Code | O | Select if the Automatic Apply Alternative Stock Code needs to be saved during processing. The |
| Shipping Location | O | Include if the customer has a preferred Shipment Location. |
Canadian Tax Options

Field Name | R/O/D | Description |
| Canadian GST | O | Save the Canadian GST number, if provided by the Canadian customer. |
| Registration Number | O | Save the customer Registration Number that was provided. |
| GST Shown By | O | Leave blank by default. |
Discounts

Field Name | R/O/D | Description |
| Based on Product Class Sold | O | Check box if the Product Class Sold is used for the customer. |
| Invoice line Discount | O | Keep the standard Invoice Line Level Discount code for the customer. |
| Based on Order Value/Quantity | O | Check this box, if a standard invoice discount is required for the customer. |
| Invoice Discount Code | O | Keep the standard Invoice Discount Code for the customer. |
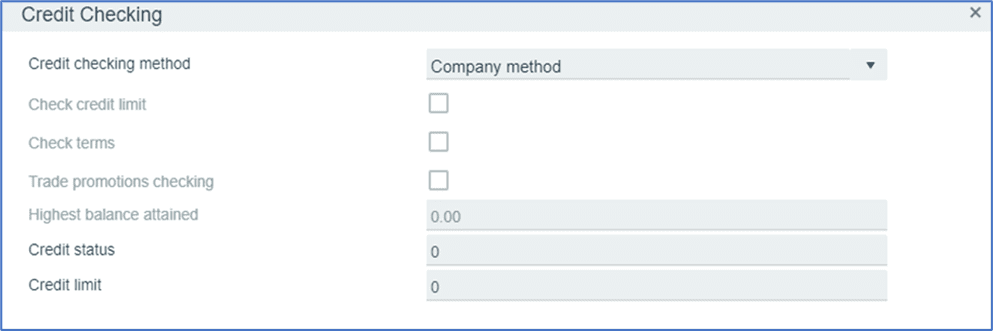
Credit Checking
Minimum Order Rules

Field Name | R/O/D | Description |
| Minimum Order Value | O | If the customer order requires a Minimum Value, the minimum value must be specified. |
| Charge Code | O | Select a default Charge Code. |
| Invoice Whole Order Only | O | Select if customer wants one invoice for the entire order. |
Dunning

Field Name | R/O/D | Description |
| Dunning Group | O | Select Dunning Group from the list, if required. |
| Dunning Fax | O | Maintain a current fax number for the Dunning contact. |
| Dunning Email | O | Maintain a current email address for the Dunning contact. |
- Save Customer

- Exit the program
Master-Sub Account
Definition
Use this program to link master & sub account relationship for customers.
Menu Path
Accounts Receivable > Setup > Master-Sub Accounts
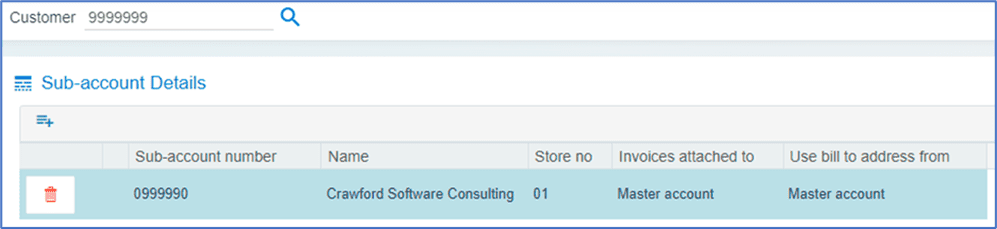
Field Name | R/O/D | Description |
| Customer | R | Enter the customer code (Master Account) to link to the sub account. |
| Sub-Account Number | R | Enter the customer code that will be linked to the (Master Account) as a Sub-Account. |
| Name | D | The customer Name will be auto populated. |
| Store Number | R | Enter the store number; this the default customer purchase order number when entering a sales order and can be changed. |
| Invoices Attached-To | R | Choose from the drop-down menu: Master Account or Sub Account. |
| Use Bill-to Address From | R | Choose from the drop-down menu: Master Account or Sub Account. |
- Click Save
